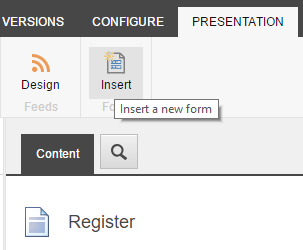
Now that we have a restricted extranet page, we need to be able to create users who can access it. Insert a new item to serve as the registration page. I am just using the Sample Item template, but you will likely have a custom page template to use. On your newly inserted register page, click Insert Form on the Presentation strip of the toolbar ribbon.
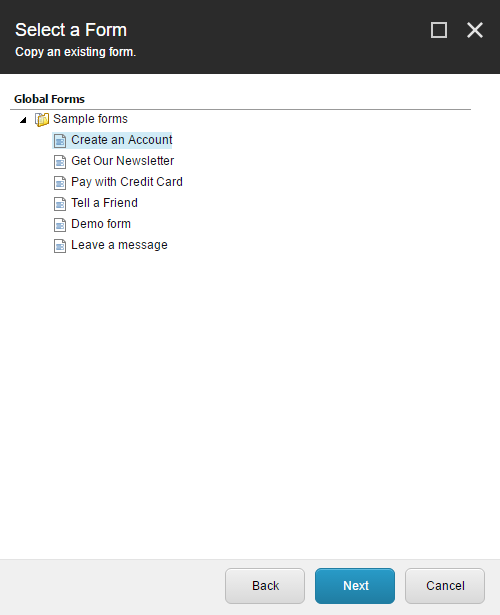
This will open the WFFM form wizard. Select the option to copy an existing form and select the Create an Account form.
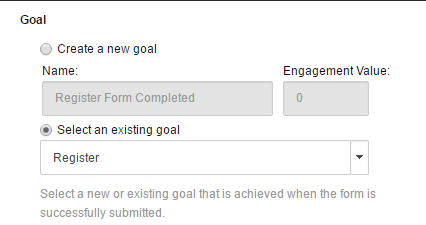
Select an appropriate placeholder for your form. On the Analytics page of the wizard, in the Goal section, select the existing Register goal.
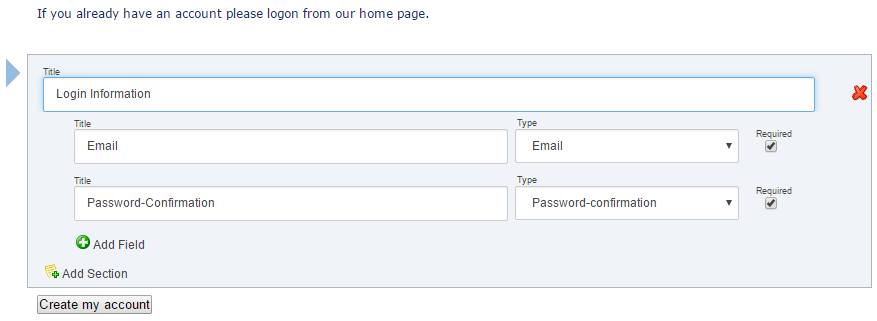
When the form designer opens, modify the fields to match your user profile. Creating a custom profile is a more developer-oriented task, so I’m just going to keep things simple and remove the Optional Information section. I am also going to modify a couple of labels. Since my register page already has a title, I am going to click the Title button in the toolbar to hide the title for the form.
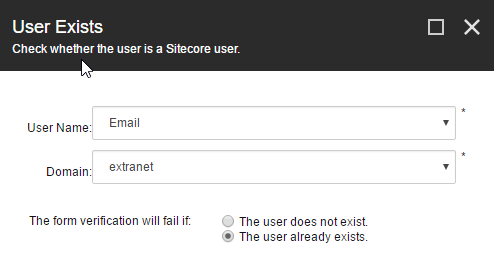
Select the Create my account button and, in the left column, click the Form Verification Link. In the dialog that opens, add the User Exists verification.
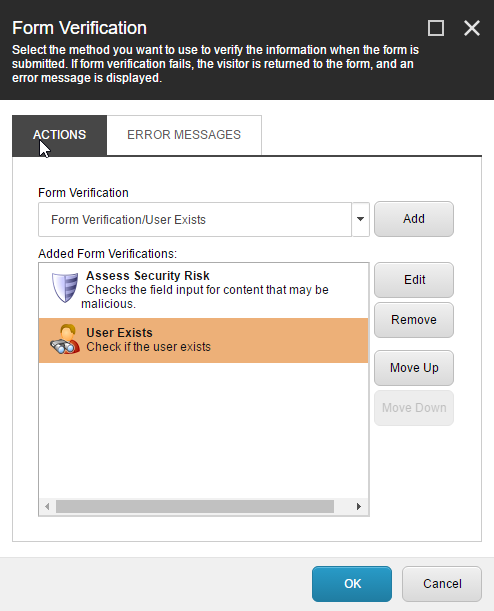
The default settings for this verification should be correct, but you can click the Edit button to confirm that they look like below.
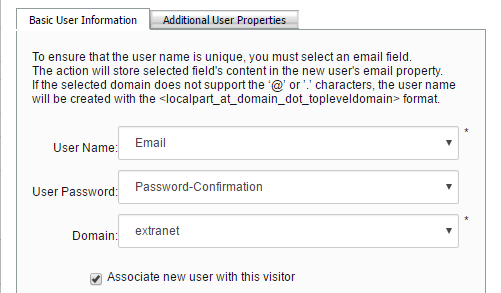
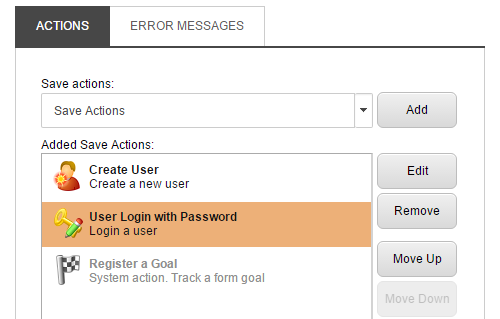
Click OK twice, then click Save Actions link to open the Save Actions dialog. Add the Create User action and click the Edit button.

On the Basic User Information tab, change the User Password field to Password-Confirmation.
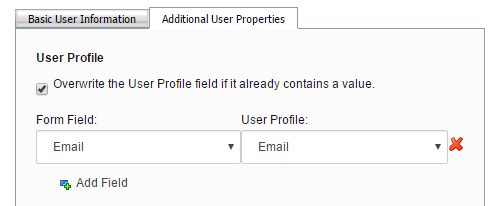
On the Additional User Properties tab, set the mapping between your form fields and user profile fields.
Add the User Login with Password action so that the user is actually logged in after registering. The default settings for this action should be sufficient, but you have to click Edit and OK to accept the defaults or you will get an error when you submit the form. Click OK, then save and close the form designer.
Optionally, you can edit the success message or set the success page to the restricted page.
At this point you should be able to publish and test your registration form. After you successfully submit the form, you should be able to access your restricted page. You should also be able to go to the user manager and see the new user in the extranet domain. The profile fields should have the information that was entered into the form.
While the registration form is now functional, the registration experience is still missing a key piece. Users generally expect to receive a confirmation email after registering. Fortunately, this is a snap with EXM.